
Welcome to BSD Maggie Sew-A-Long Post #2 –
Today we are going to talk about Pattern Preparation, Preparing Fabric, and Choosing Your Size.
I am relatively new to the world of PDF patterns (I’ve been using them less than a year). Previously, I used commercial patterns exclusively. Nearly everything is available online in some form or another, so PDF patterns just make sense. What I love about Bella Sunshine Designs’ PDF Patterns is that they have layers enabling you to print a single size or all the sizes depending on your specific needs.
I actually print the entire thing and trace the sizes I need, especially if I need to blend between sizes. However, in our household, if I did print by size, I would select the layers for sizes 0, 6 & 8, and 10, & 12. My youngest is a straight 0, my 18-year-old is a 6 bust and waist, 8 hips; and I am a 10 bust 12 waist and hips.
HOW to PRINT and use pdf patterns
The Maggie Pattern is not designed to be printed in its entirety. The pattern instructions contain two charts (one for the bust adjustment pieces, and one for without) that indicate which pages to print for the pattern pieces required for your garment. The nice thing is that you can print just the pattern pieces, and then use your laptop, computer, or tablet to view the pattern instructions without having to print them out, as well.
In order for the pattern to print correctly, you must print from ADOBE PDF Viewer, not the app, and not another PDF program.
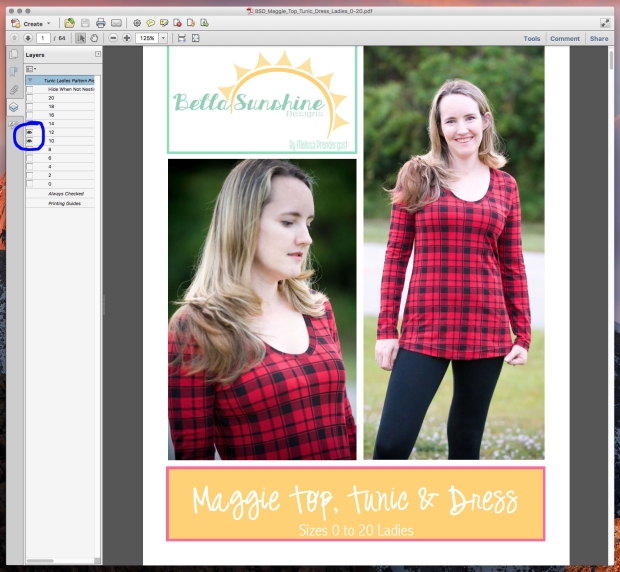
This pattern includes layered pattern tiles that allow you to choose only the sizes you wish to print. In Adobe Reader, click on the layers icon while the file is open.
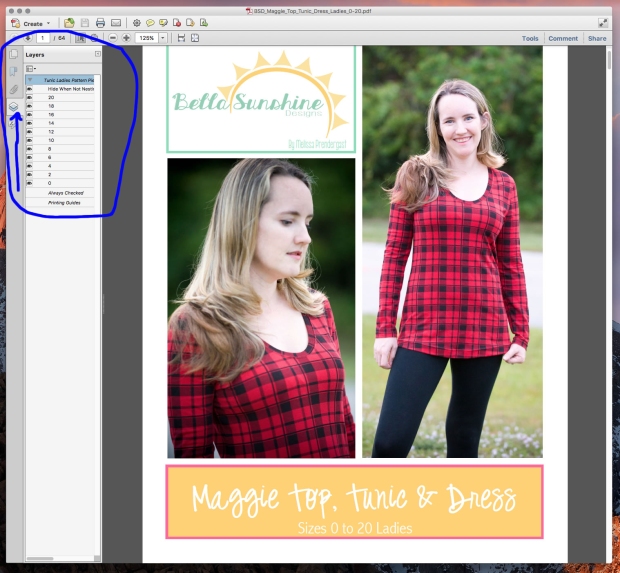
Click on the eyeball to turn size layers on or off. If you are selecting only one size, be sure to deselect the layer that reads “Hide When Not Nested.”
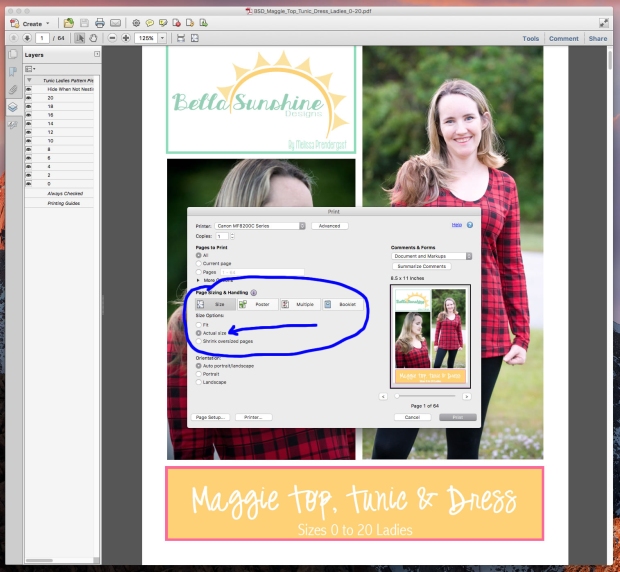
Be sure to set your printer to not scale the pattern pieces by selecting either “Actual Size” or “Custom Scale: 100%” in your print dialog.
Refer to the charts on pages 3 and 4 of the pattern to determine which pages to print for the size you would like to sew. It is recommended to print page 21 by itself first to check the print square for correct scale before printing the rest of the pages.
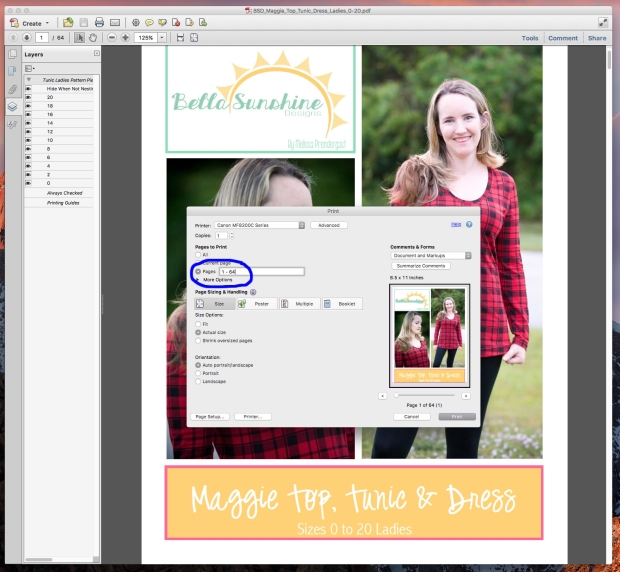
To save time, you can select every page you need to print at once by putting a comma between the different sequences of pages. For example, “1-15, 5-7, 55-64” (numbers are not accurate to pattern pages).
For more information on printing issues, please visit: Tips & Tricks for Printing Your PDF Sewing Pattern.
How to prepare your fabric
Nobody wants to throw a damper on your sewing enthusiasm, but if you just got back from a fabric shopping trip crazed excursion, you probably want to cut into it right away.
DON’T
Fabric must be pre-treated before sewing with it to prevent shrinkage problems in a finished garment. The most common information I can find is to pre-treat your fabric in the same manner in which you plan to wash your completed garment. For me, that means regular cycle on hot dry – I sew for two teenage girls who do their own laundry and don’t like to take the time to sort their clothes.
Obviously different types of fabric need different treatments – For example, you won’t want to wash that luscious new piece of merino wool on hot and then hot dry. Hand washing and the dry cleaners are always an option, but require a little more pre-planning.
Since we are talking about knits for the Maggie, a home washing machine will suffice.
choosing your size
Finally, we’re getting to the meat and potatoes!
The Maggie has a tailored fit; therefore, it is recommended that you get recent, accurate measurements of yourself for the best fit. It is best to have someone take the measurements for you to help keep the torso measurements parallel to the floor.
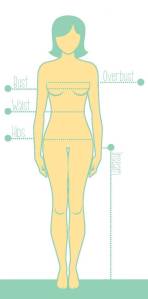
For this pattern, the bust and overbust are the most important measurements. They determine what size you should choose. If your bust is more than 3″ larger than your overbust measurement, it is recommended you choose your sized based on the overbust measurement and use the bust adjustment pattern pieces for a better fit.
It is very important to ignore your ready to wear size – sewing patterns are sized differently. It is a good idea to sew a practice, or muslin, out of test fabric just to verify the size.
What do I do if my measurements fall in multiple sizes?
The best way to get a custom fit is to blend sizes through the waist and hips. For example, I measure in the size 12 bust, 10 waist, and 14 hips. I start by tracing the 12 on the upper portion gradually moving to the size 10 when I hit the natural waist mark, and then gradually moving back out to the size 14 when I get to the hip.
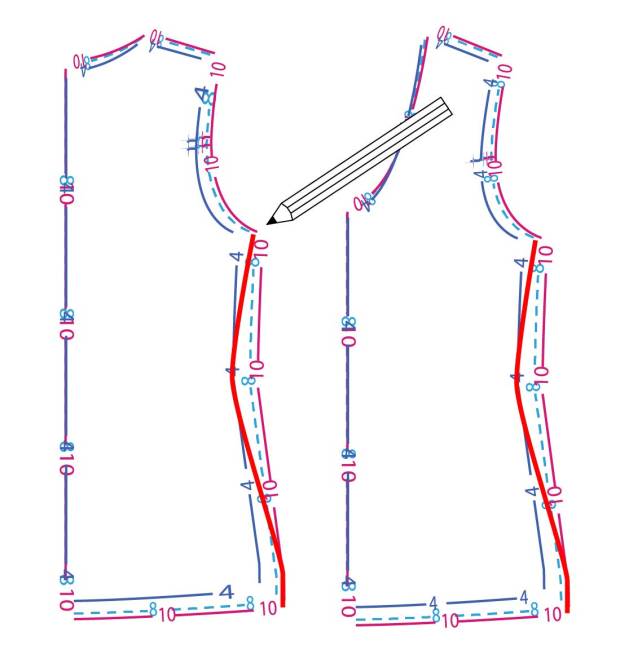
Clear as mud? The pattern explains grading and sizing extensively, so you can refer to it if you are still having issues.
What’s Next?
We’re ready to start sewing! Next we will be talking about how to lengthen or shorten the pattern, and then I will be showing you two different methods for sewing the Maggie. Both are dresses, one was finished entirely on the serger (except for the twin-needle hems), and the other was finished entirely on a standard sewing machine using a stretch stitch. We will also be talking about the shoulder seams and inserting the sleeves.
Comment below if you have any questions, and I will see you soon for the next installment of our Sew-A-Long.

One thought on “BSD Maggie Sew-A-Long Post #2”